Wednesday 27 December 2017

Chestnut chocolate torte

Now anyone that knows me, must know that I think the chestnut is massively underused during the festive season on our fair isle. So, when a friend of mine was leaving for New Zealand, it seemed to me that a fitting farewell cake might be some kind of brownie laced with chestnuts. After reading rave reviews of those from Dan Lepard, they were promptly produced and enjoyed. But that was just the start.

It started me wondering if some kind of chocolate chestnut torte might be in order...


Turns out I was right. The dense brownie base is a perfect foil for a light mousse topping united by the subtle flavour of chestnut. This is a really deep (I think that's the effect of the chestnut puree)rich torte which has a long chocolate flavour which the booze gives a very gentle kick. The chestnuts in the brownie base give textural contrast to the light delicate mousse to sit atop. It's not too sweet. It's a simply beautiful balance.

I'd like to try this with chestnut flour, to see what that adds. You could also get away with twice as much mousse if you wanted. I probably would...

Chocolate Chestnut Torte

Ingredients:
For the brownie base:
100g cooked chestnuts, chopped roughly
100g dark soft brown sugar
50ml bourbon/rum/brandy (your choice) 
1tsp vanilla extract
1 egg, separated
100g butter
100g dark chocolate
35g plain flour
15g cocoa
1/4tsp salt
100g chestnut puree
1tbsp double cream
For the mousse topping:
250g mascapone
300ml double cream
200g chestnut puree
50ml Bailey's Irish cream
Icing sugar (to taste)
To decorate:
Icing sugar
Cocoa
Grated chocolate

Method:
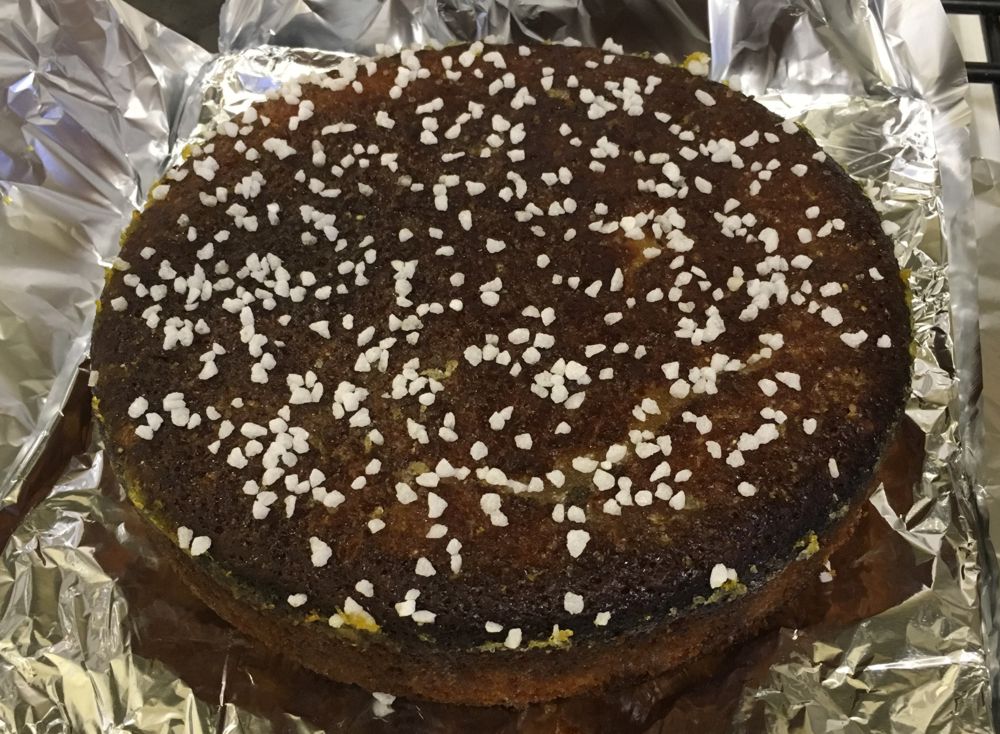
1. Preheat the oven to 170°C and grease and line a 9" round baking tin.
2. Mix the chestnut pieces, 50g of the sugar and the alcohol in a bowl.
3. Melt the chocolate and butter together in a bain marie.
4. Meanwhile, whip the egg white until stiff. Gradually add in the remaining sugar to create a meringue.
5. Beat in the egg yolks.
6. Slacken the the chestnut puree with the double cream and beat into the melted butter and chocolate along with the salt.
7. Sieve in the flour and cocoa.
8. Fold in the meringue.
9. Bake for approximately 25 minutes, until barely set in the middle. Leave to cool.
10. Once cooled remove from the tin and put on a serving plate. Replace the wall of the tin over the base to allow you to build the torte.
11. Whip the cream to light peaks with the Bailey's and icing sugar.
12. Beat the mascapone and chestnut puree, then mix with the Bailey's cream.
13. Cover the brownie base with the mousse and leave to set for a few hours.
14. Once set, unmould and decorate with icing sugar, cocoa and grated chocolate.

Friday 15 December 2017

Lemon Drizzle cake


I took my first proper cake into work today: a lemon drizzle. This was the same cake as I did for a wedding a couple of years ago, (I never quite managed to blog that one...) so I was reasonably confident but you never quite know. It did seem to go down quite well though.


When making it, it seems like it's more drizzle than cake, so to say it's a moist slice, is an understatement. As someone in the team rightly pointed out though, that's the point! It's still retains a pretty good structure. The different drizzles, I think, give maximum penetration and using different types of sugars gives pleasing textural differences. Oh and it's unashamedly lemony!

Lemon drizzle cake recipe

Ingredients:
200g caster sugar
4 eggs
150ml sour cream
Zest 1 lemon
60ml lemon juice
150ml oil
200g plain flour
1.5tsp baking powder
0.5tsp bicarbonate of soda
Drizzle 1:
4tbsp icing sugar
45ml lemon juice
Drizzle 2: 
70ml lemon juice
Zest 1 lemon
80g demerara sugar
NB: One lemon has about 30ml juice

Method:
1. Line and grease an 8" cake tin and pre-heat the oven to 180°C.
2. Whisk the eggs and sugar together until pale and fluffy.
3. Add the sour cream, lemon zest, lemon juice and oil. Whisk together.
4. Sift the flour, baking powder and bicarb and fold in.
(NB. The batter will seem very liquid, but don't worry it'll be OK)
5. Bake for 45 minutes at 180°C
6. Whilst the cake is baking make the two drizzles by simply mixing together the ingredients until the sugar has dissolved.
7. Once the cake is baked, use a skewer to make holes all over the cake. 
8. Brush on drizzle 1 all over the top of the cake using a pastry brush.
9. Brush on drizzle 2, waiting for each stroke to be absorbed before adding more. This'll take some time.
(NB. It'll seem that there's no way the cake will take that much moisture - it will) 
10. Leave to cool. Unmould and devour.

Thursday 23 November 2017

Celeriac soup with smoked haddock and leeks


One of the perks of working at home is the ability to make lunch in a full kitchen. Sometimes, I might take that just a tad too far. This might have been one of those times.

I had some celeriac in the fridge and I have been trying to eat more fish recently, so there was some  haddock too. Consequently I came up with this mongrel of a recipe, but it's tasty. Very tasty.

It's not too fishy, but the flakes of white fish under the earthy creamy soup are great combination. The cheesy crouton even works as well. (I'm normally a staunch advocate of the "no fish with cheese" rule). The crispy chorizo and pumpkin seeds for a garnish worked remarkably well too.

Altogether this was a meal born of opportunity but was perfectly fitting for a cold winter's day.

Celeriac soup with haddock and leeks

Ingredients:
~300g Smoked haddock, boned removed, skin on
~500ml milk
Bay leaves
Peppercorns
1 leek, finely sliced
Celeriac, peeled and cut into large dice
Bunch parsley, roughly chopped, stalks reserved
Optional crouton and garnish:
Slice of bread
Strong cheddar, grated
Slices of chorizo, large dice
Pumpkin seeds

Method:
1. Put the haddock skin up into a frying pan and use enough milk to just cover. Add bay leaves and peppercorns.
2. Bring the milk to a gentle simmer. Take the pan of the heat. Turn the fish over and cover. Leave for 20minutes.
3. Meanwhile, sweat the leeks in a generous knob of butter over a gently heat until soft. (I find a pinch of sat and use of lid works well).
4. Remove half the leeks from the pan and reserve, if you want to make the crouton.
5. Add the celeriac to the leeks and fry briefly to add a bit of colour.
6. Drain the milk from the haddock and add to the celeriac and leeks. Top up with water, if required. Add the parsley stalks.
7. Bring tot eh boil and simmer until the celeriac is soft, ~15min.
8. Remove the parsley stalks and blitz the soup until smooth. Add more water/milk until it reaches your required consistency. 
9. Put the soup in a pan and the chopped parsley leaves and keep warm. Season to taste (I'd suggest being aggressive with the pepper)
10. To make the garnish, dry fry the chorizo and pumpkin until the meat is crisp and the pumpkin seeds "popped"
11. To make the croutons, toast the bread and smother with leeks. Cover generously with cheese and grill to melting perfection.
11. To serve, put flakes of the haddock in the bottom of the serving dish and cover with the soup. Scatter over some chorizo and pumpkin seeds and finish with a drizzle of extra-virgin olive oil.

Sunday 19 November 2017

Pecan Squares


A few weekends ago I wanted to make a cake version of a pecan pie for work colleague so I was inspired to make pecan squares from The Great Big Cookie Book (Walden, H., 1999). They weren't too bad but as they were double baked the shortbread was too crisp and the whole thing just too brittle. The lemon in the shortbread was inspired though.

Consequently I had another go this weekend, changing the caramel to mirror that from a millionaire's shortbread. These were, I think, much better. The shortbread held together and the topping felt much more luxurious and comforting. Salt in the caramel offset the sweetness although the flavour of the maple syrup didn't really come through. A small square 2" is more than enough to give you a sugar hit be that as a pick-me-up at for threeses at work or

If I made them again I'd probably slightly reduce the amount of caramel (or increase the amount of pecans halves) to showcase the nuts a little more. I'm not quite sure how to increase the maple syrup factor though; a drizzle, maybe? 

Clearly further experiments are required. However, if you want to give this work in progress a go, here's the recipe.

Pecan squares (makes about 20)

Ingredients:
For the shortbread:
7oz plain flour
4oz caster sugar
2oz pecans, toasted, finely chopped
1 egg, beaten
Zest 1 lemon
Pinch salt
For the caramel:
150g butter
397g condensed milk
100g soft dark brown sugar
50g maple syrup
1/2 - 1tsp sea salt
400g pecan halves, toasted

Method:
1. Line and grease a 30 x 20 cm shallow baking tin (a swiss roll tin) and pre-heat the oven to 190°C.
(While the oven is heating up you might as well toast your nuts, having spread them on a large baking sheet. Just be sure to watch them like a hawk and check them every few minutes. The last thing you want is burnt nuts.)
2. Sift the salt and flour into a bowl and mix with the caster sugar.
3. Rub the butter into the flour to create breadcrumbs. Stir in the pecan pieces and lemon zest.
NB Steps 2 and 3 can be done by pulsing in a food processor
4. Add the egg and bring the mixture together, with a very gentle quick knead on a floured surface.
5. Press into the tin and chill for 30 mins.
NB The mix may be very sticky so be careful.
6. After 30min fork the biscuit all over and bake for 20min until golden. Once baked leave to cool.
7. While the biscuit base is cooling, make the caramel topping.
8. In a heavy bottomed pan place the sugar, condensed milk and butter. Slowly bring to the boil and simmer gently for 5 minutes.
9. Stir in the salt and maple syrup. Mix in the pecans and cover thoroughly.
10. Pour the caramel-pecan mix over the shortbread and try to distribute evenly. Leave to set.
11. Once cool, cut into squares using a large heavy knife.
 

Tuesday 11 July 2017

Carnitas


!WARNING!

If you are a pork fan this recipe may have a significant impact on your life

 !WARNING!

I had some unexpected time this evening and with a spare avocado on my hands (as you do) had decided I needed guacamole. My freezer held some cider braised pulled pork which floated my boat but was just not appropriate with guac.

Consequently, I decided to go "full Mexican" and bought a pork shoulder (as you do) to make carnitas. Clearly a very restrained mid-week meal...


Holy moly, I'm glad I did. This pork was so unbelievably tasty, I must have eaten at least as much as I put on the plate just whilst I was plating. It was so tender yet with a real bite and a caramelised exterior all combining to burst into a beautiful mouthful of porky goodness. It was just immense. Utterly delicious. 

On top of that it was ridiculously easy to make and far far quicker than I had imagined.

To have with the carnitas, I had the aforementioned guac, crackling chunks from the shoulder skin, some re-fried beans and feta, all atop a tortilla. I realise I could have made a burrito roll but this seemed more refined.

Seriously, carnitas vs. pulled pork is now a very close contest. You need to try this out.

Carnitas (recipe taken from Williams-Snoma "Mexican")

Ingredients:
~1.5kg boneless pork shoulder
6 cloves garlic, peeled and halved
Strips of zest from one orange
180 ml orange juice
2tsp sea salt
Oil, if required

Method:
1. Trim the fat from the pork and put in a wide heavy saucepan.
2. Cut the shoulder into 1" strips and then cut in to chunks ~1"x2".
3. Add the pork cubes to the pan with the garlic, orange zest, orange juice and salt. The meat should be in a single layer, if possible.
4. Add enough water to barely cover the meat and bring to the boil over a medium heat.
5. Reduce to a medium-low heat, cover partially and cook for ~1hour until the liquid has evaporated, stirring occasionally.
6. If the pork isn't quite tender, add a bit more water and continue cooking.
7. Once the pork is tender and the liquid has evaporated, remove the orange zest and garlic cloves (if possible) then brown the meat in the fat (adding more if required).

Monday 19 June 2017

Nut and caramel cake

This was a cake-based penance. Somehow I was not informed of an impending colleague's birthday thus failed to provide a cake at a suitable moment. Although there wasn't a great burden of expectation (fortunately), I still felt I had failed so to make up for it I offered to make a bespoke cake. I created this based on the direction of:
I love nuts ... and I love anything fudgy/caramely/toffee ...

It's a triple threat: two layers of pistachio cake sandwiching a walnut cake, held together by a maple and pecan cheese icing and smothered in a caramel buttercream doused liberally with assorted nuts (pecans, walnuts, hazelnuts and pistachios).


I spent ages searching Soho for pistachio paste as I really wanted a green cake. Unfortunately it was all in vein as I just can't find it, anywhere (not even in Italian delis!). If I ever do find it, I will definitely be repeating this cake.


Both the cake recipes are quite unconventional and when they came out of the oven I wasn't that confident with how the bakes had gone. I was really quite worried how this was going to turn out. I needn't have been. All the parts came together remarkably well and complemented each other. The different cake textures came together. The light fragrant flavour of the pistachios was a good counterpoint to the heavier walnut (the lemon providing a delightful, gentle, refreshing zing). The various icings complimented the nuts giving a really rounded flavour: neither too sweet nor too bitter. After a while in the fridge it actually cut remarkably well. On top of that it's actually one of my better looking cakes. And the recipient was very happy with it.


Ridiculously I only managed a quick slice before rushing downstairs to an event and when I came back it was all gone. I was quite disappointed. Both in missing out on cake and not being able to do a more thorough set of tasting notes. Oh well. 

On to the recipe. Be warned: it's not short.

Nut and caramel cake recipe

Ingredients:
Pistachio cake (adapted from a Ruby Tandoh recipe):
200g pistachio
250ml sunflower or almond oil
250g caster sugar
1½ tsp vanilla extract
4 large eggs
100g plain flour
1½ tsp baking powder
A pinch of salt
Walnut cake (from a Jeremy Lee recipe):
350g walnuts, shelled and peeled
4 large eggs, separated
225g caster sugar, plus 1 tbsp extra
The finely grated zest of 1 lemon
50g unsalted butter, melted and kept just warm
Pecan maple cream
50g pecans, toasted and chopped
250g mascapone cheese
~60g maple syrup
50g icing sugar
Double cream, if required
Caramel buttercream
100g caster sugar
50ml water
30g butter, cubed
60ml double cream (or replace half with 30ml milk)
150g butter, softened
100g icing sugar
To decorate:
~200g assorted nut, toasted and chopped (I used 50g each of pecans, walnuts, pistachios and hazelnuts)

Method:
1. Preheat the oven to 180°C. 
2. For the pistachio cakes, grease two 8" round cake tins.
3. Using a food processor, blitz the pistachios until finely ground. Beat the oil with the caster sugar, vanilla extract and eggs to create a batter. In a separate bowl, combine the pistachio, flour, baking powder and salt, then lightly fold it into the batter.
4. Divide the batter between the two tins, level the tops and bake for 25 minutes, or until the cakes are just beginning to shrink from the sides of the tins and a knife inserted into their centres comes out clean. Leave to cool in the tins before removing.
5. For the walnut cake, line an 8" cake tin with parchment.
6. Grind the walnuts quite finely, retaining a little of their texture.
7. Put the egg yolks and sugar into a mixer, beating until pale and greatly increased in volume. Take your time here as the lighter and silkier the mixture, the better the resulting cake.
8. Beat the egg whites in another bowl until peaked and stiff. Add the extra 1 tbsp of caster sugar, continuing to beat until stiff once more.
9. Partially fold the nuts and zest into the egg yolk and sugar mixture. Add one‑third of the beaten whites, mix well, then stir in the remainder. Add the melted butter and mix gently. Swiftly decant the batter into the prepared cake tin.
10. Bake for 45 minutes, or until cooked through, ensuring this by inserting a sharp knife into the middle. If clean when removed, then the cake is done. Rest upon a rack until cool.
11. For the pecan maple cream, beat the mascapone until soft then beat in the maple syrup and icing sugar. This is a balancing act between sweetness and flavour - adjust the proportions of each until you are happy. Add a splash of cream to change the texture to your taste. Stir in the pecans. Firm in the fridge.
12. Level off all the cakes and sandwich together with half the maple pecan cream: pistachio, walnut, pistachio.
13. The butter cream is flavoured with a fresh caramel. To make the caramel put the water and sugar in a pan and heat over a medium heat until it reaches a light golden brown.
14. Add the butter, whisking until melted and combined. Take off the heat and whisk in the cream and milk. Decant into a bowl and leave to cool.
15. Beat the butter until soft and then beat in the icing sugar. Finally beat in the cooled caramel. Again change the amount of icing sugar to taste. Firm in the fridge.
16. To finish the cake. Apply a thin crumb layer of the butter cream all over the cake and refrigerate.
17. Liberally apply the rest of the butter cream to the cake and then press the nuts in to decorate.

Friday 12 May 2017

Kelpot's chocolate pinata cake

Today was Kelpot's last day, so I spent most of last night putting together her leaving cake. Given that Kelly loves both cake and chocolate it was quite an easy design process.

I ended up with a three tier chocolate and vanilla cake, sandwiched with chocolate fudge icing, covered in white chocolate buttercream and decorated with kingsize buttons.


What I hadn't really figured into my night was all the cooling and waiting. Even though I used the buttercream recipe I had used before I was quite worried by the lack of combination and setting early on. Perseverence paid off and with time it made a very good icing.

That wasn't the end of it though. I had to do a three tier cake because I cut the middle cake into an annulus thus creating a cavity to conceal a landslide of Maltesers, Rolos and Munchies.

I wasn't there for the actual cutting, but had briefed a couple of people so that during the slicing they could be assured that nothing was going wrong.

By all accounts it went well. I came back to an office deafened by the silence of post-cake inactivity, so I think it went down pretty well. However, I will leave the final comment to the text message that I received from a colleague:

"SHUT THE FRONT DOOR THAT CAKE IS THE BIZ"

Sunday 9 April 2017

Apple beignets

On an idle Sunday morning, with nothing much but culinary exploration to fill my time, it seems apple beignets are a delightful breakfast*.

Hot apple swaddled in a crisp sweet batter. What's not to like? 

OK so it is a faff setting up the deep fat fryer, but there's not really any other way of cooking these; shallow frying just wouldn't do it. My fryer is ever so slightly too small, so I had to cook each slice individually, making it slightly more time consuming, but still worth it, I think. That may also account for the slightly reduced "puff".

I never realised beignets were so simple. I'm not entirely sure you need to rest the batter for two hours. I think you could get away with half an hour. I think it depends just how hungry you are...

The batter makes plenty for encasing two apples, which should give you 10-12 slices.

125g plain flour
30g caster sugar
Pinch of salt
1/2 tsp baking powder
2 eggs
50ml milk
60ml dry cider
2 eating apples 
Oil for deep-frying

Method:
1. In a mixing bowl, combine the flour, sugar, salt and baking powder. Add the eggs and whisk until combined.
2. Lightly whisk the milk, cider and eggs to combine and add to the dry ingredients, whisking until smooth. Add the liquids in little by little to avoid lumps. Let it rest for two hours.
3. Peel, core then slice the apples about 5mm thick. Dip them into the batter, then fry in oil at 180°C until golden brown.
4. Dust with sugar to finish and enjoy them while still hot.

*You should know by now that this blog is about eating tasty food, so don't judge. Besides it's one of your 5-a-day...

Monday 6 March 2017

Chocolate and banana cake

I was "commissioned" (I use inverted commas because I wasn't actually paid) to make a cake for a colleague's birthday. 

It was the first time that I've created a cake by completely drawing on elements that I have previously used. The cake used all recipes that I have used before just in a new combination.

The specification was based on the recipients preferred flavours: chocolate and banana with come caramel thrown in to round things out.

It turned out quiet well, despite being an "assembly" job.

 (Yet again, I forgot about taking photos so rushed...)

The flavours all worked really well together. I was worried that it might be rather too sweet, but that fear was definitely not realised. The banana cream brought a freshness with a depth of flavour coming from the chocolate fudge icing. There was a pleasing banana "aroma" permeating through the whole cake. Despite each mouthful being comprised of different elements, the whole thing worked rather well. It has a well-rounded flavour that was long on the palette. 

I initially thought there many have been some benefit it using a butter-based chocolate cake rather than oil-based. however, this was based on trimmings of the cake in isolation. In combination with the other elements, however, I don't think anything need to change.

The recipe drew on the following elements:

Chocolate cake: Banana, chocolate and peanut butter cake with an added 100g melted chocolate added to the batter


Chocolate fudge icing: Half the amount of Icing 4 from the wedding cake tasting with an added 1tsp of cocoa
 

Caramel icing: Twice the amount of the external frosting from the Caramel cake

Tuesday 28 February 2017

Pancake Day 2017

I love Shrove Tuesday. Any day where an entire nation celebrates a single food stuff is good with me. Most people go down the dessert route: crepes with lemon and sugar as pudding. You can't argue with a classic like that.

I prefer to fully embrace both the pancake and day aspect of the event: three meals, means three opportunities to eat pancakes.

Breakfast - Banana pancakes with banana caramel sauce
 

Lunch - Herb crepes filled with smoked salmon and creme fraiche with capers and cornichon.


Dinner - Layers of pancakes dowsed in maple syrup and stacked with black pudding, bacon, sausage and steak. Topped with a fried egg.


I admit I did go American twice but the toppings were significantly different to justify it and make for a very tasty day. Roll on 2018...

Monday 30 January 2017

Strawberry gateaux

As part of my annual January task of "eating the freezer", I am often confronted by items that are quite difficult to find a discrete use for. One such item was some strawberry puree which I made with the remains of my glut of strawberries after my first adventure to a PYO last summer.

I was jammed out and had been stuffing myself for days with the beautiful berries and couldn't face any more. I pureed the remaining half pound and popped it in the freezer where it had quietly sat.

I wasn't quite sure what to do with the puree but once the idea of a strawberry cake stuck me, there was no going back. There are many American recipes available but the vast majority seem to include "jell-o" to get the requisite taste and colour. I was determined that jelly should play no part in my cake.


I was pretty pleased with the result. The cake itself clearly tasted of strawberry although it was more subtle. The jam added "smash-you-in-the-face" strawberry hit. There were clearly strawberries in there. The cake was rich and buttery with a slightly close  texture but it was still light. It wasn't too sweet (which I had feared) and the tang of the cream cheese in the icing was welcome.

The odd thing was the crazy grey-ish colour! I put this down to it being all natural ingredients - no colourings used (although I was tempted!). I'm aware it's a bit dull from the outside, I'd decorate with fresh strawberries, if they were in season.

I wonder if I used an oil-based cake rather than butter the flavour, and colour, might be more pronounced. Perhaps I might even make a foray into the world of chiffon cakes. I'll need a lot more strawberries though...

Recipe for Strawberry Cake with White Chocolate Cream Cheese Icing (adapted from Happy Foodie recipe)

Ingredients:
225g butter
225g caster sugar
4 large eggs
210g plain flour
2tsp baking powder
25g cornflour
225g strawberry puree
1tsp vanilla extract
Strawberry jam for the filling
For the icing:
4oz butter
4oz cream cheese
4oz white chocolate
100ml double cream
2oz icing sugar

Method:
1. Cream the butter and sugar together until white and fluffy.
2. Add the eggs one at a time and beat in. Sifting in a tbsp of flour with each egg will stop the mix splitting.
3. Beat in the strawberry puree and vanilla until combined.
4. Sift in the cornflour, flour and baking powder.
5. Divide the mix between two 8" lined cake tins and bake at 180°C for 25mins, or until done.
6. While the cake is baking, make the icing.
7. Melt the cream and chocolate together in a bain marie. Leave to cool.
8. Beat the butter until soft and pale. Gradually add in the  sugar. Beat in the cooled chocolate and cream mi.
9. Beat thoroughly and refrigerate to cool and thicken.
10. Once the cake and icing are cooled, it is time to construct.
11. Spread a generous layer of jam over one of the cakes. Followed by about a generous helping of the icing (no more than a third) and sandwich the cakes together.
12. Spread a thin layer of icing around the top and sides of the cake and refrigerate. 
13. Once the base layer of icing has set, slather on the remaining icing. 

Wednesday 11 January 2017

Lime and pistachio cake

This was a cake I made for a leaving do at work last Autumn, but I've been asked for the recipe so it's a very belated write-up.

Sorry about the picture, I blame taking it at work...

I was asked for a vegetable cake and carrot was just to obvious. Once my thoughts turned to courgette, I then got thinking about how to decorate. And green was the only way to go, hence the lime and pistachio. I wanted to try and make the cakes actually green but pistachio paste is very hard to get hold of in SE London! Nonetheless, it went down a treat. A lovely moist cake, with a rich cream cheese icing cut with lime and the occasional crunch from a sweet pistachio.

Lime and pistachio cake

Ingredients:
250g butter
200g caster sugar
3 eggs
1tsp vanilla extract
Juice and zest of 2 limes
200g plain flour
1tsp baking powder
1/4tsp salt
300g courgette (skin on), grated and left to drain in a sieve
75g pistachio + 25g chopped pistachio to decorate
Lime curd filling:
3oz caster sugar
1 eggs, well beaten
Grated zest and juice of 2 limes
2oz butter
Lime cream cheese icing:
50g butter
200g cream cheese
85g icing sugar
Juice and zest of 1 lime

Method:
1. Grease and line two 8" cake tins. Pre-heat the oven to 180°C.
2. Cream together the butter and sugar.
3. Beat in the eggs, one at a time until combined. Add some of the flour after each egg to prevent the mixture splitting.
4. Beat in the vanilla extract, lime zest and juice.
5. Sift in the remaining flour, baking powder and salt and fold until combined.
6. Fold in the grated courgette and pistachios.
7. Divide the cake mixture between two 8" greased and lined cake tins.
8. Bake at 180°C for 25 minutes until the sponge is cooked (the top will spring back and the sides will have come away from the sides of the tin).
9. Whilst the cakes are baking and cooling make the lime curd. Place the ingredients in a heat proof bowl and suspend over a saucepan containing hot water. Cook until the mixture is thick enough to coat the back of a wooden spoon, about 20 minutes.
10. To make the icing beat the butter until soft.
11. Gradually beat in the cream cheese until completely combined.
12. Beat in the lime juice and zest and sugar. (Add sugar to taste).
13. To construct the cake, spread lime curd over the top of one of the cakes.
14. Invert the top cake and spread half the cream cheese icing over the bottom of the cake. Turn this cake the right way up and sandwich the two cakes together.
15. Spread the remaining icing over the top of the cake.
16. Decorate with chopped pistachios and lime zest.
Related Posts with Thumbnails